Hello!
With SlashMap you can quickly find meeting rooms and locate where
your coworkers are seated.
This brief guide will walk you through the setup process, which
should take only around 5 minutes.
After this your organization will be ready to take advantage of all
SlashMap benefits.
Expand the sections below to get detailed information on the given
subject.
Setup steps (around 5 minutes)
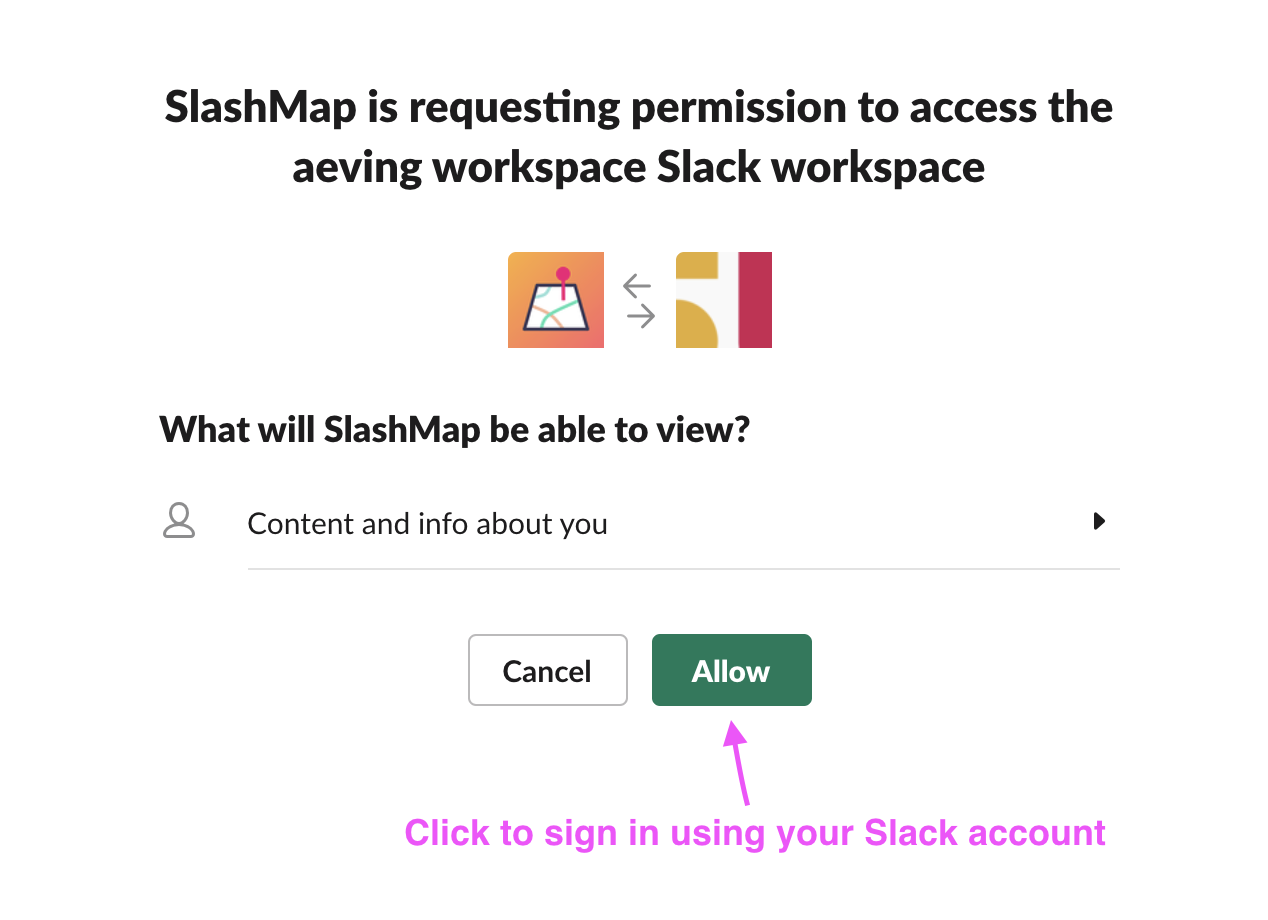
SlashMap uses Slack account for signing in, so you don't need to create any new account.
Or simply click here to jump directly to the login page.
You may be asked to log in to your Slack account first in case you are not logged in the browser.
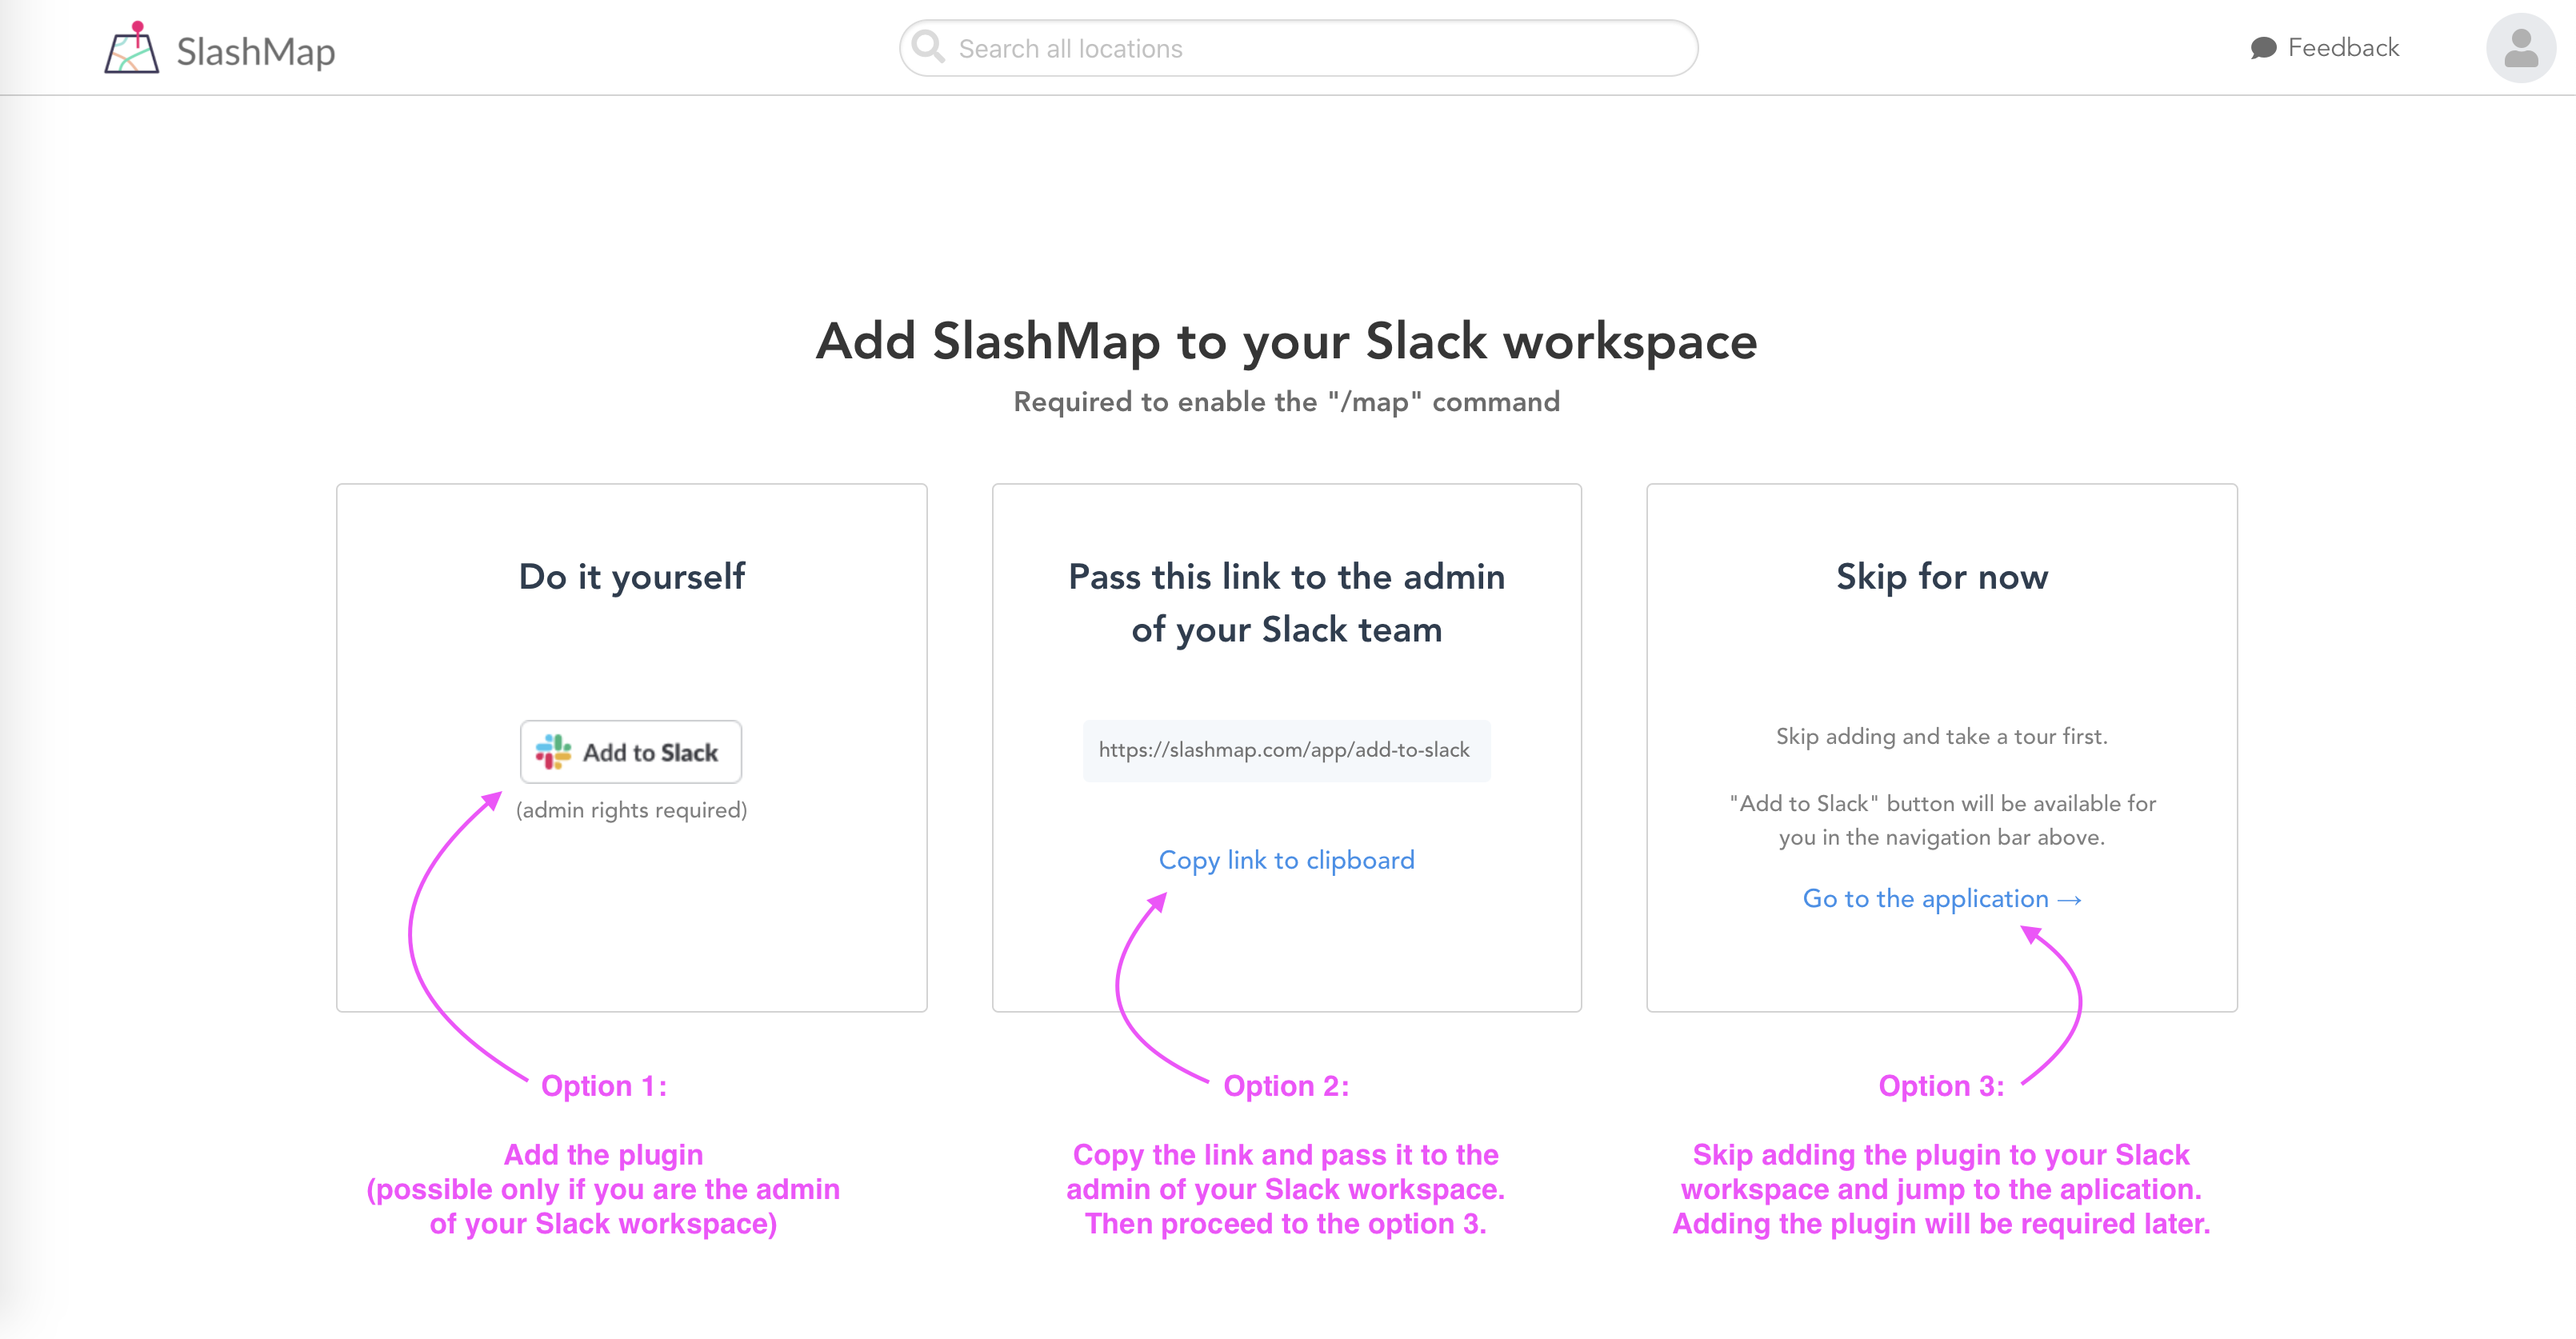
You may skip this step for now to see the application first (Option 3).
If you decide to add the plugin to your workspace now (Option 1), please follow instructions from step 3. Adding the plugin to Slack below.
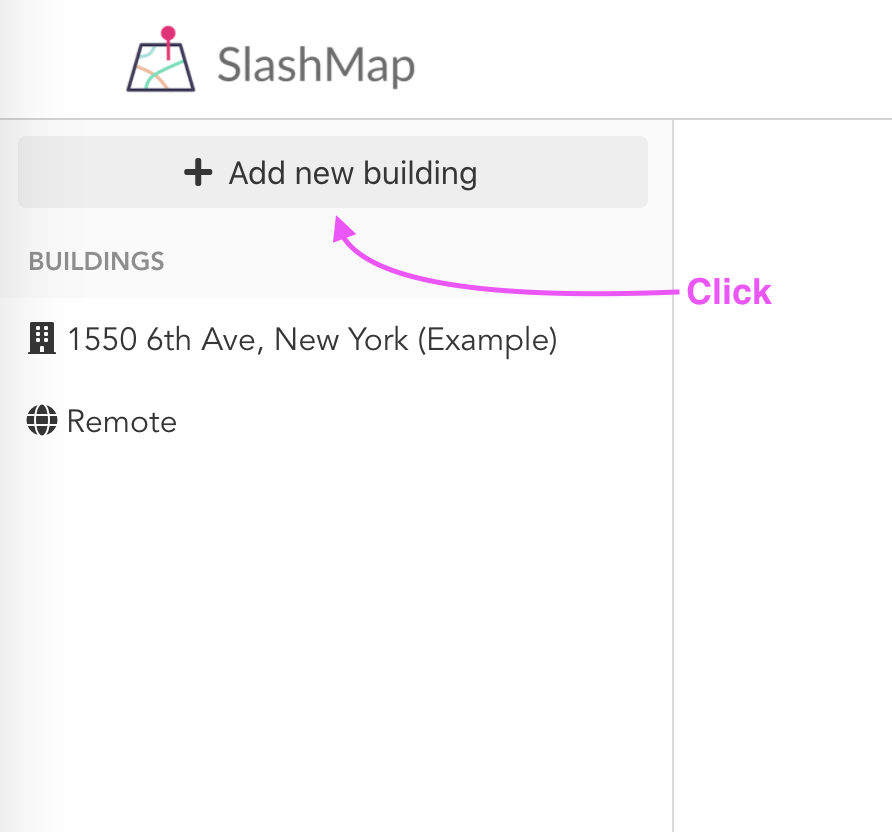
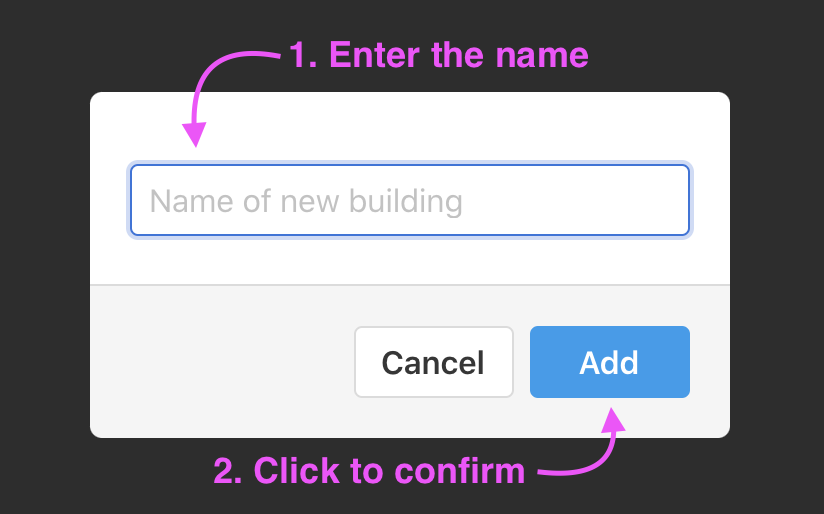
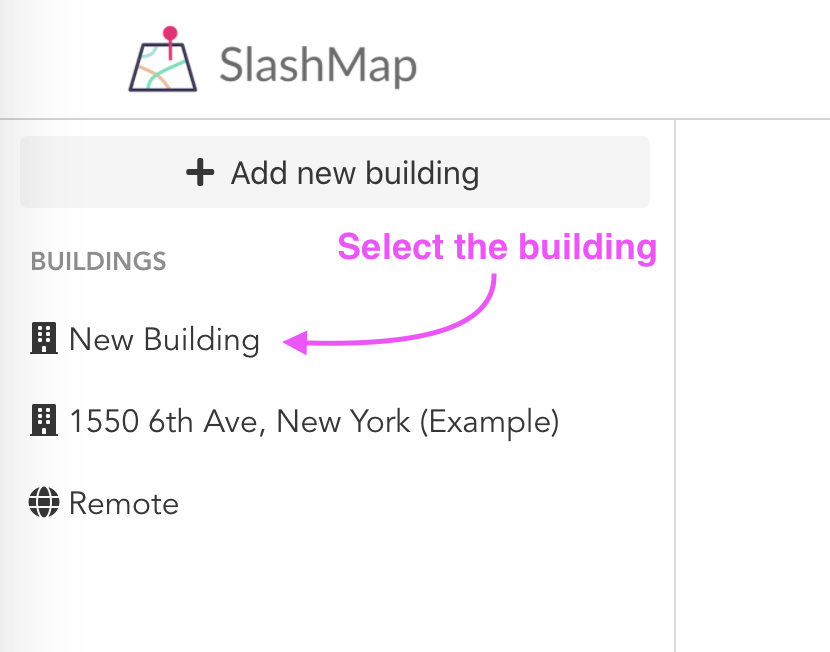
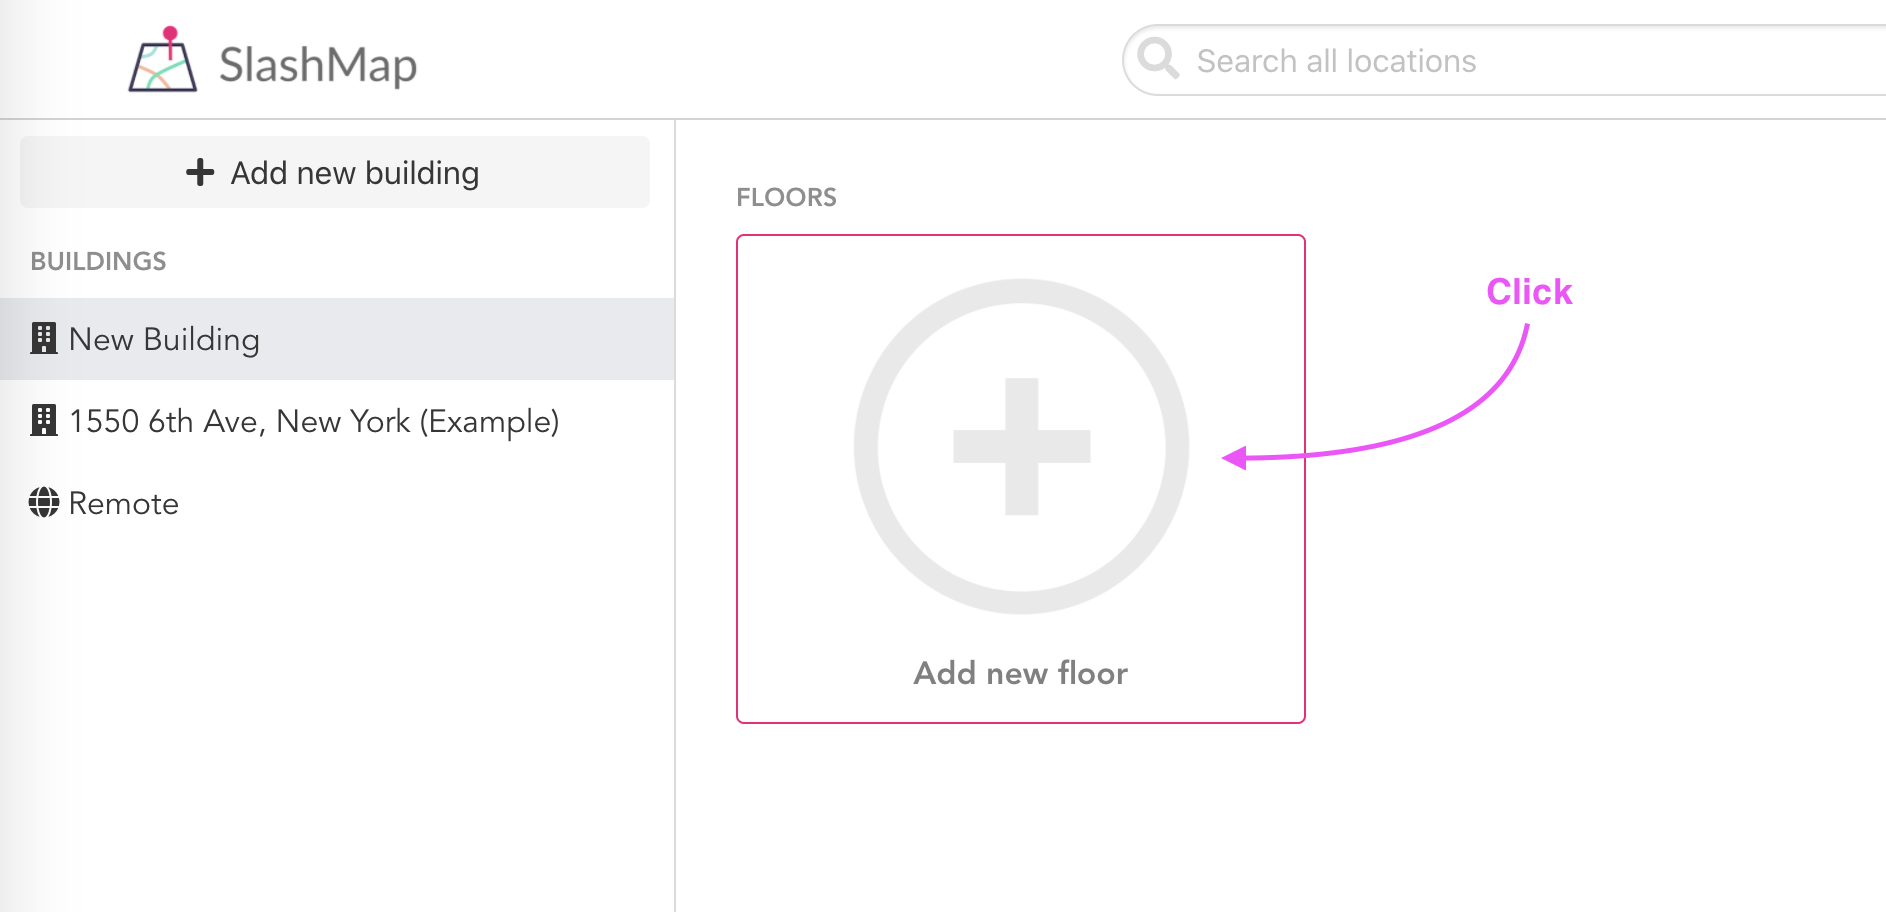
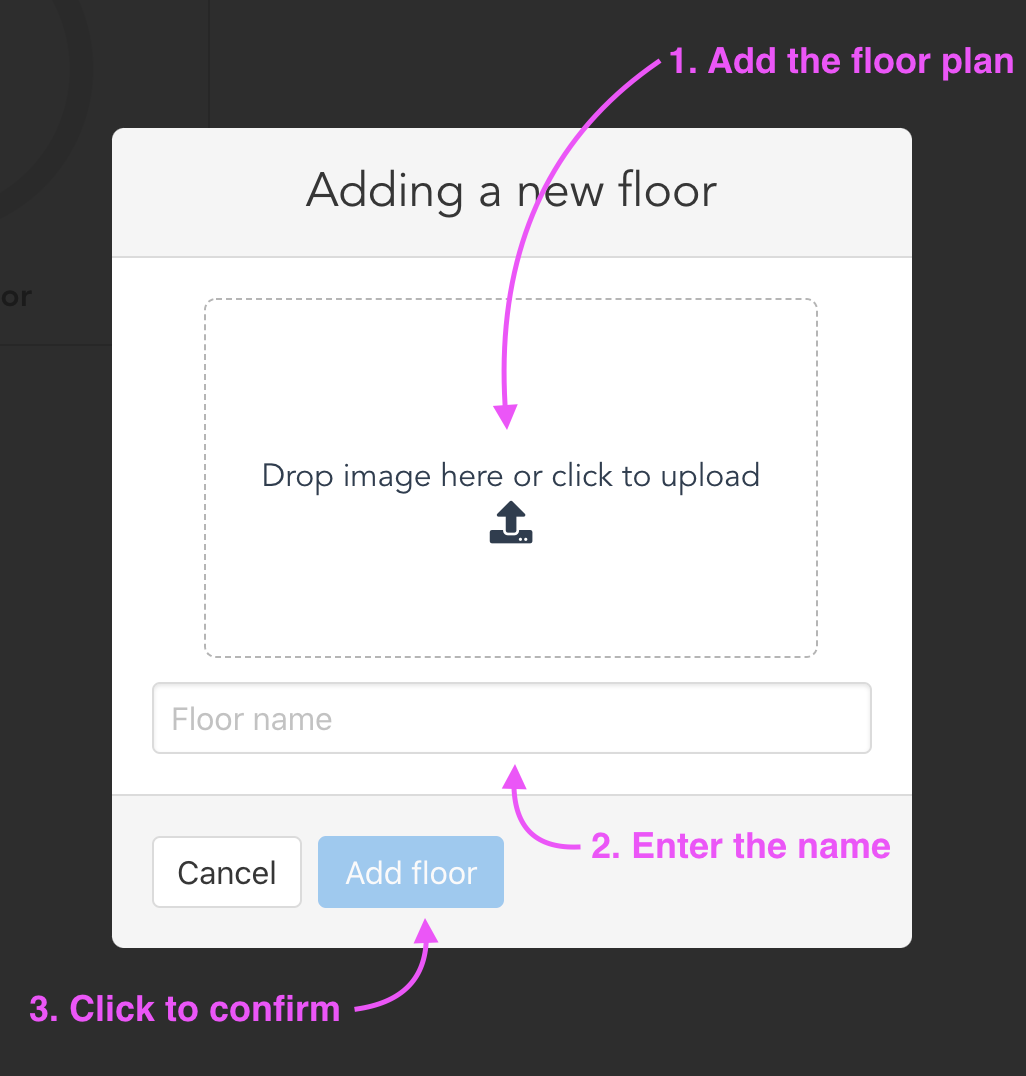
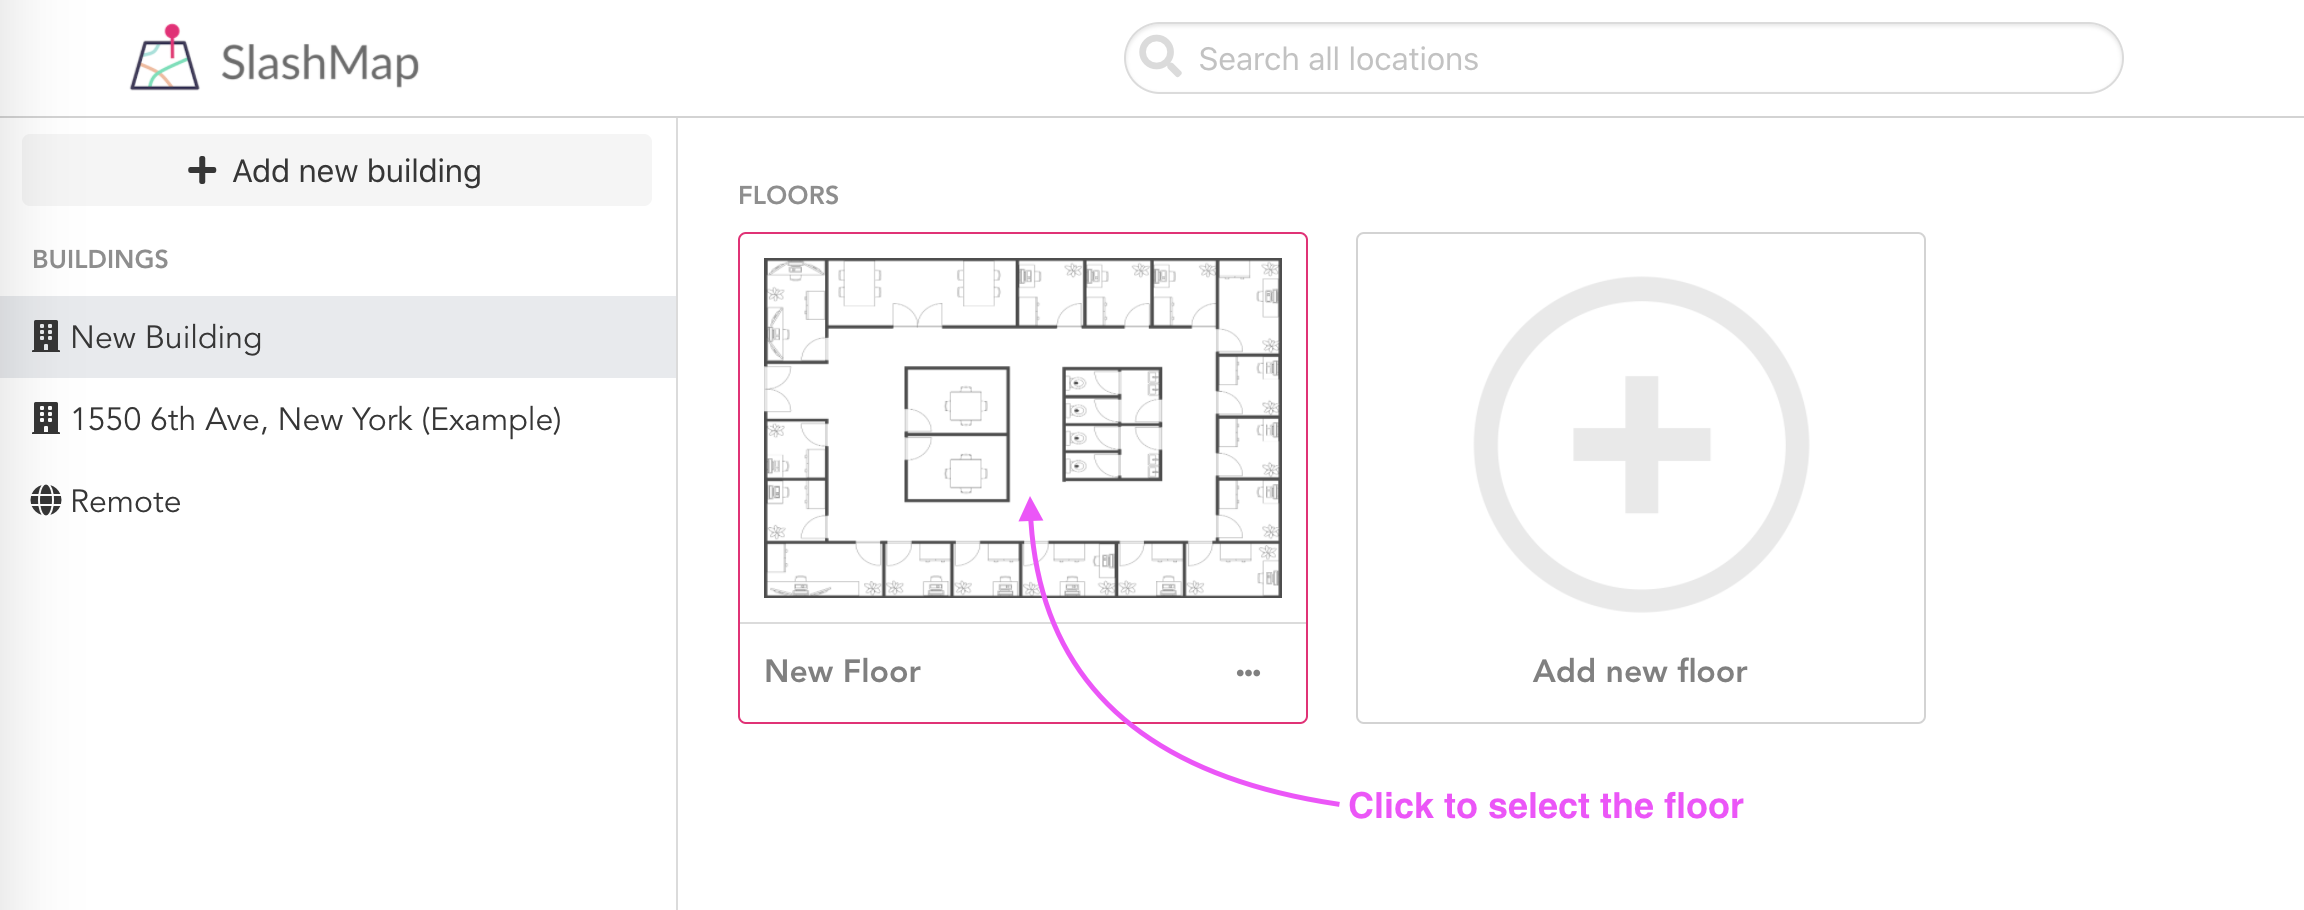
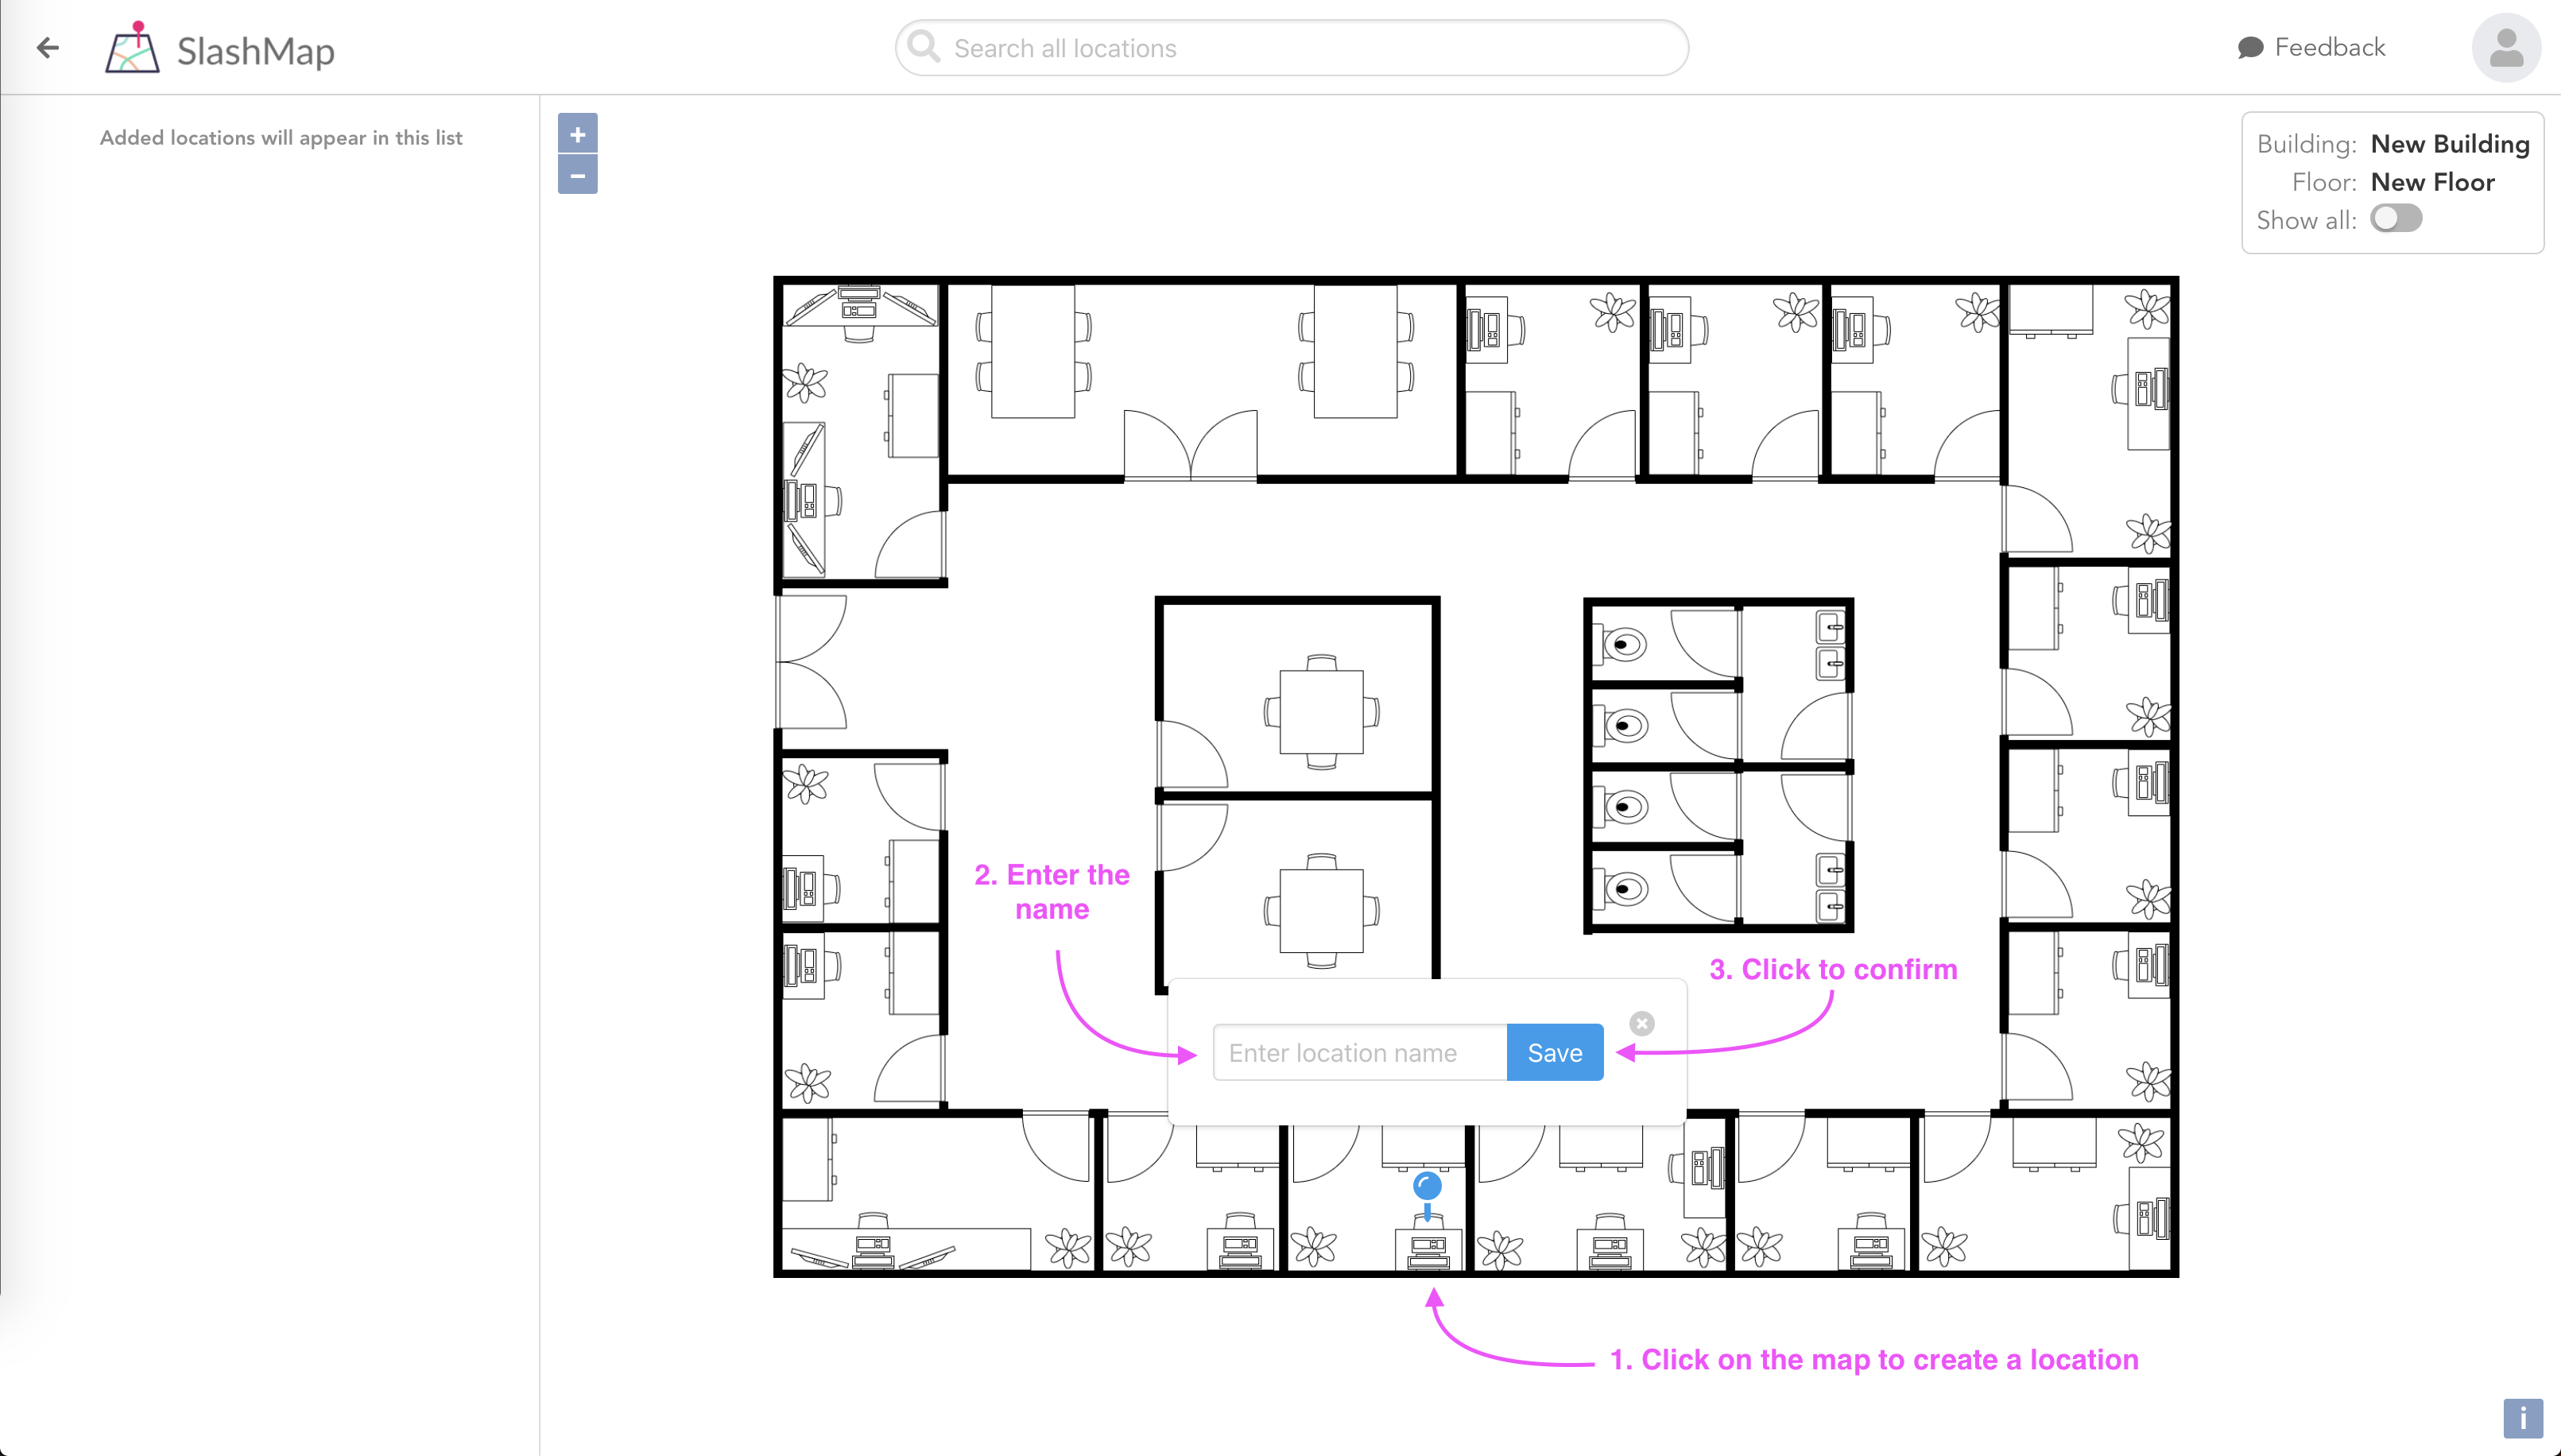
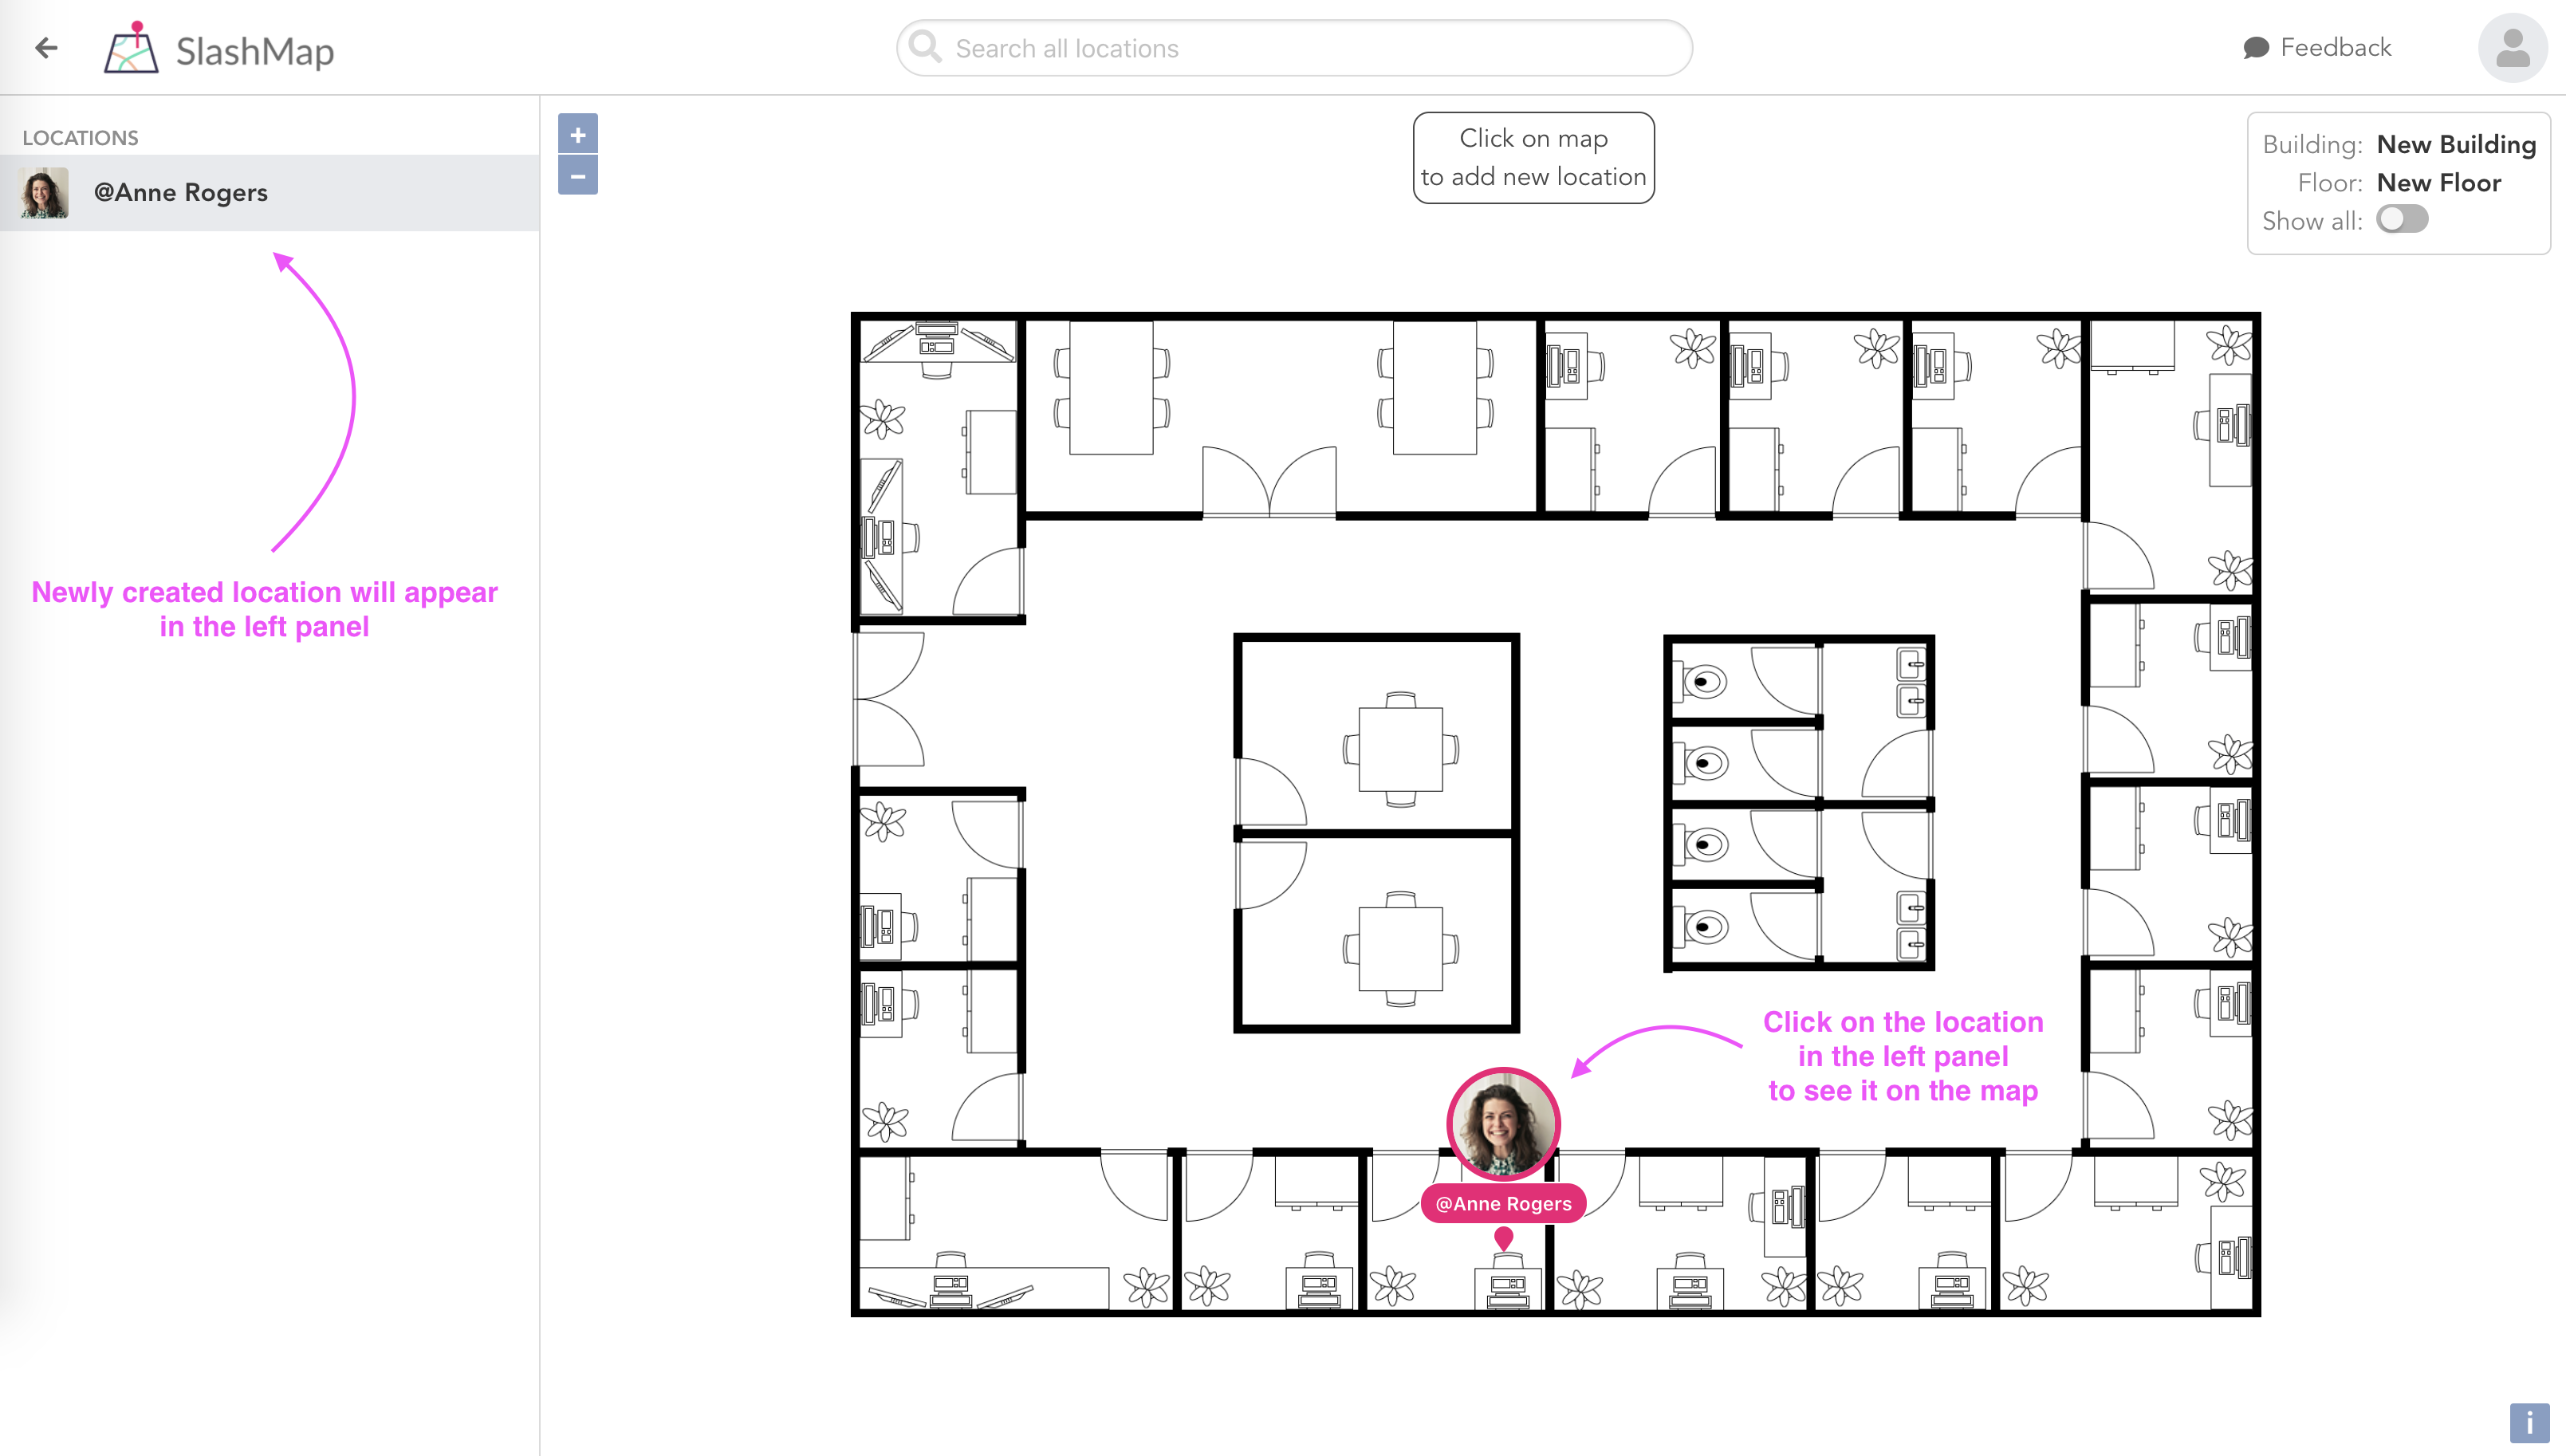
SlashMap allows you to mark locations on an uploaded picture. The picture represents a map of a single floor. Floors are grouped into buildings.
Usernames are prefixed with the "@" sign in order to utilize the autocompletion in Slack.
SlashMap must be added to your Slack workspace in order to use
/map [Location name]
command in Slack. However, locations can be managed and serched
via the web application even if the pluggin is not added to your
Slack workspace.
If you added the plugin in the
step 1.3.,
then you can jump to the
step 4..
"Add to Slack" button on the top bar is displayed as long as the plugin is not added to the workspace.
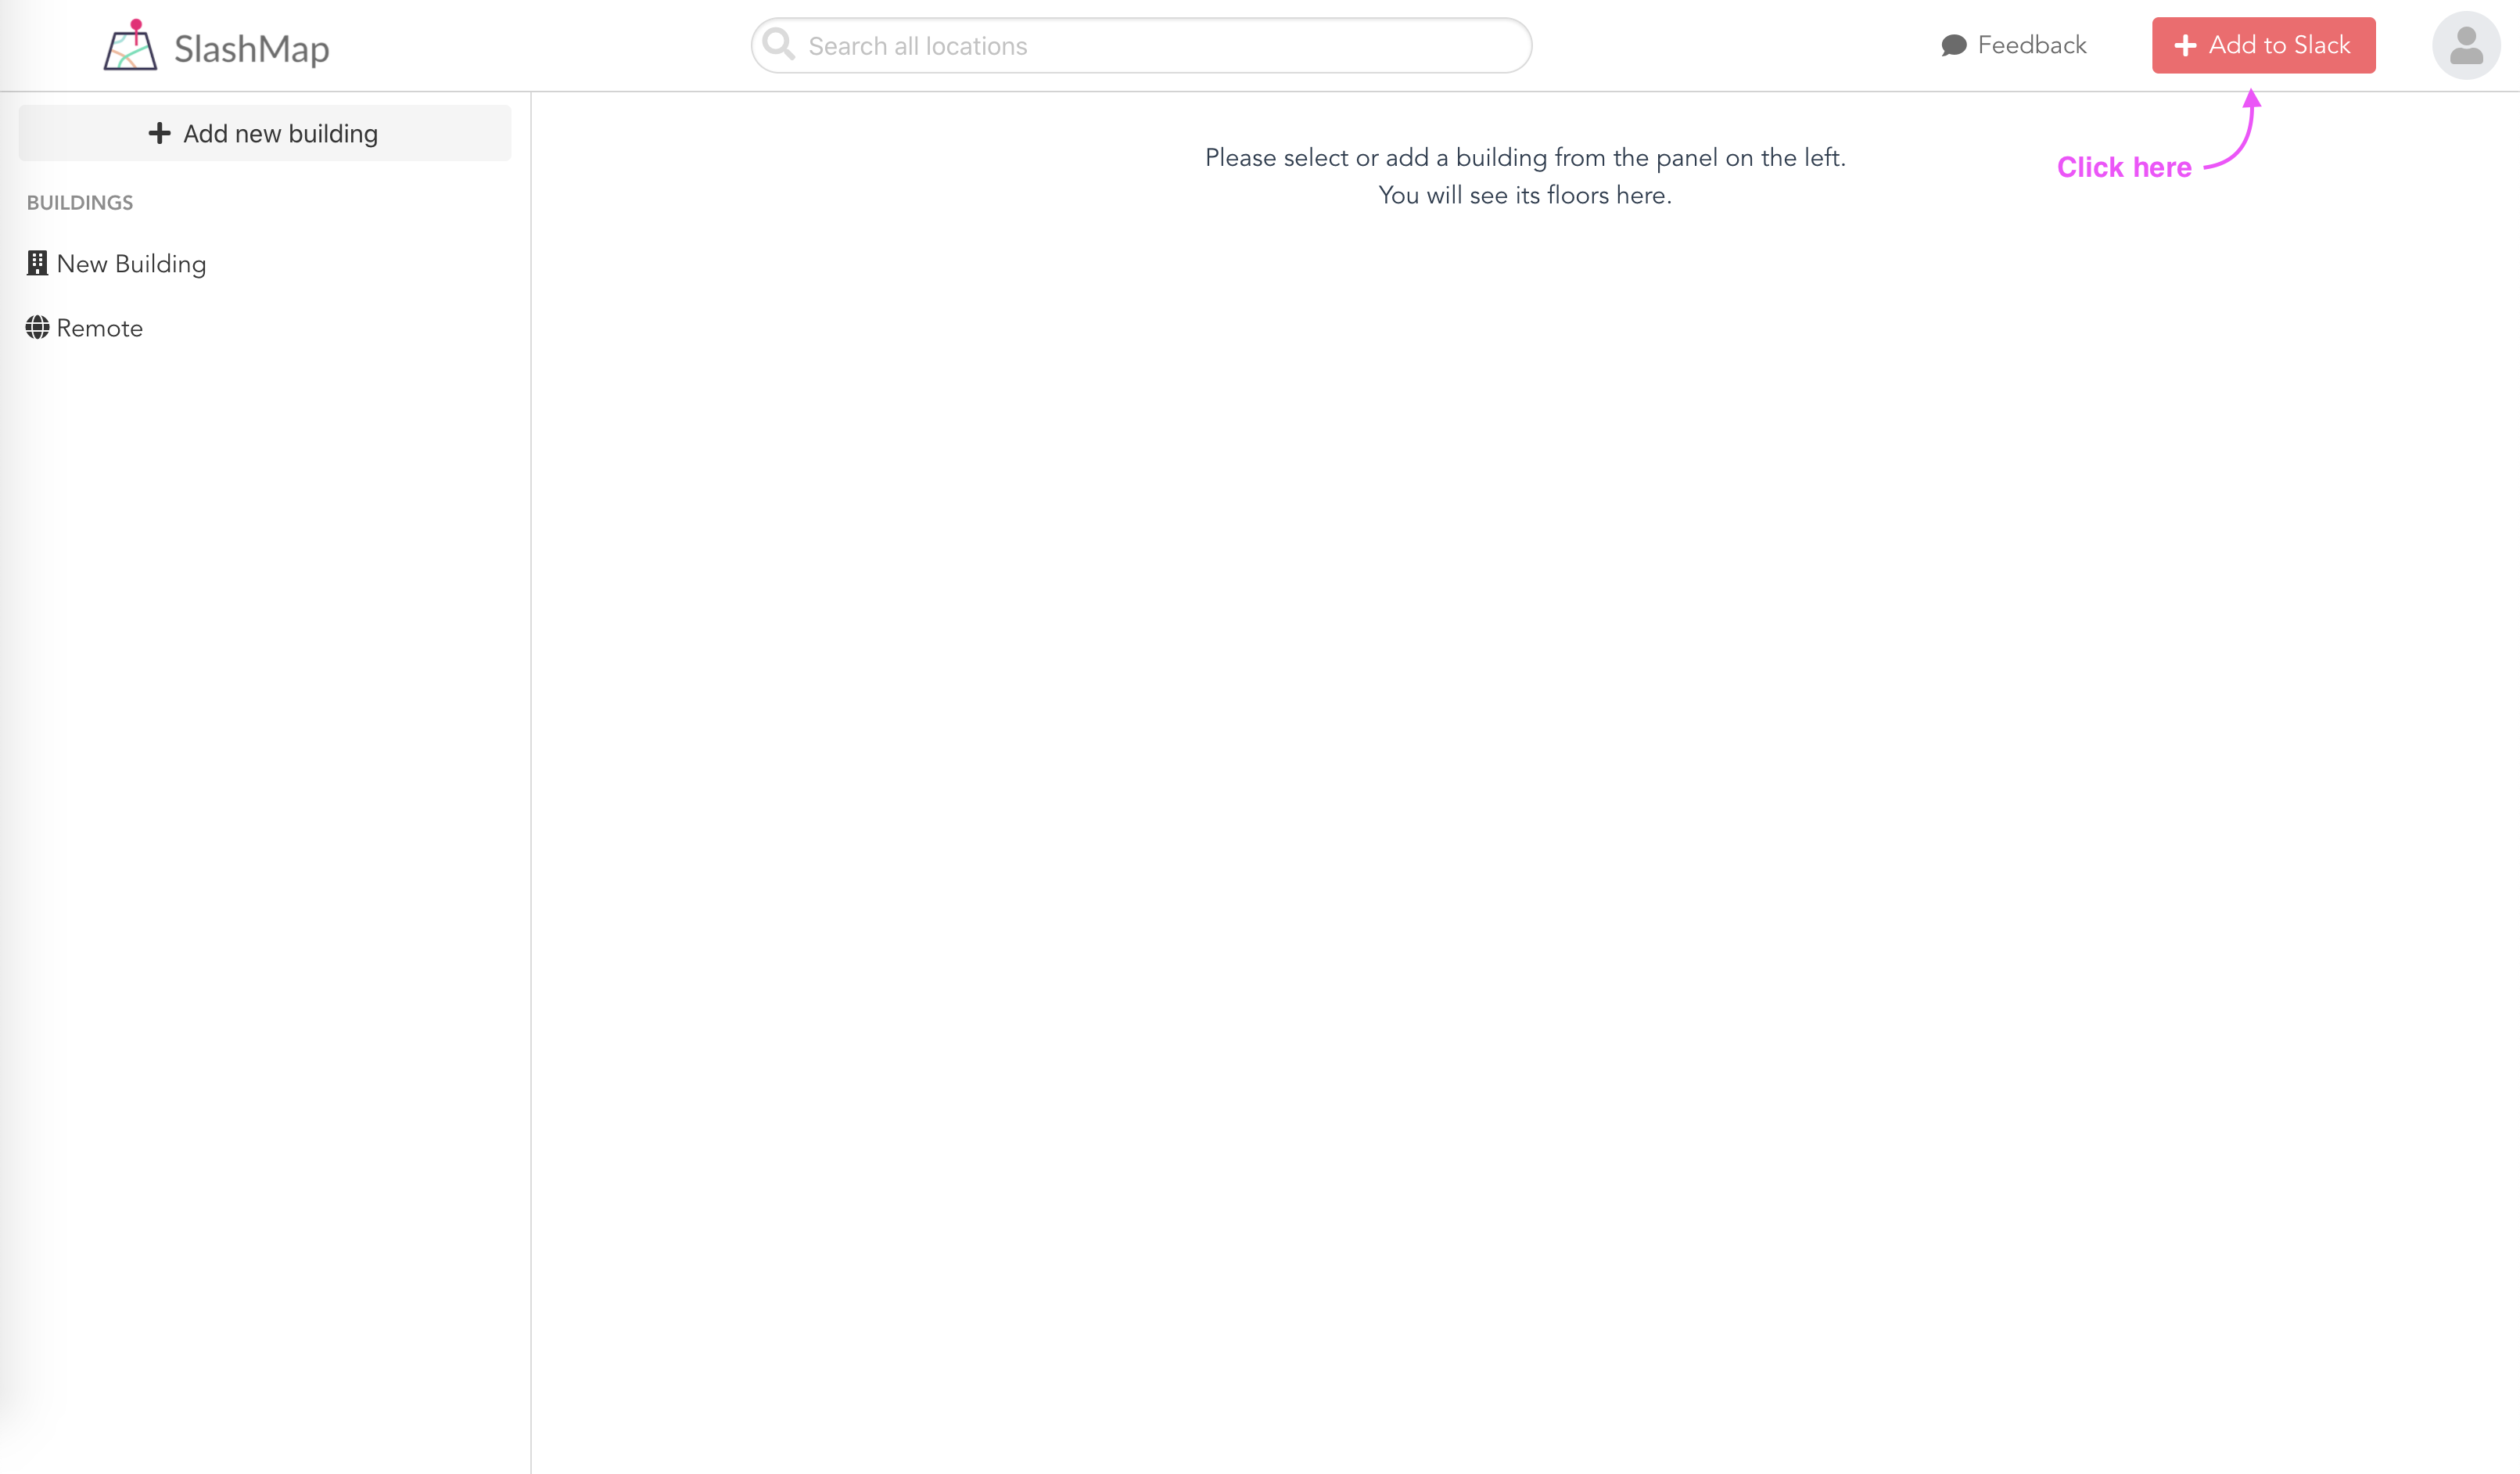
You can choose one of three options: 1. If you are the administartor of your workspace you can add the plugin by yourself. 2. If you are not the administartor of your workspace you should copy the link and send it to the administartor. If you do not know who is the aministartor, you can ask your manager or IT team member. 3. This option will prohibit your workspace from using the crucial feature of getting a map in Slack, and other nice improvements such as avatars on the map, and username autocompletion.
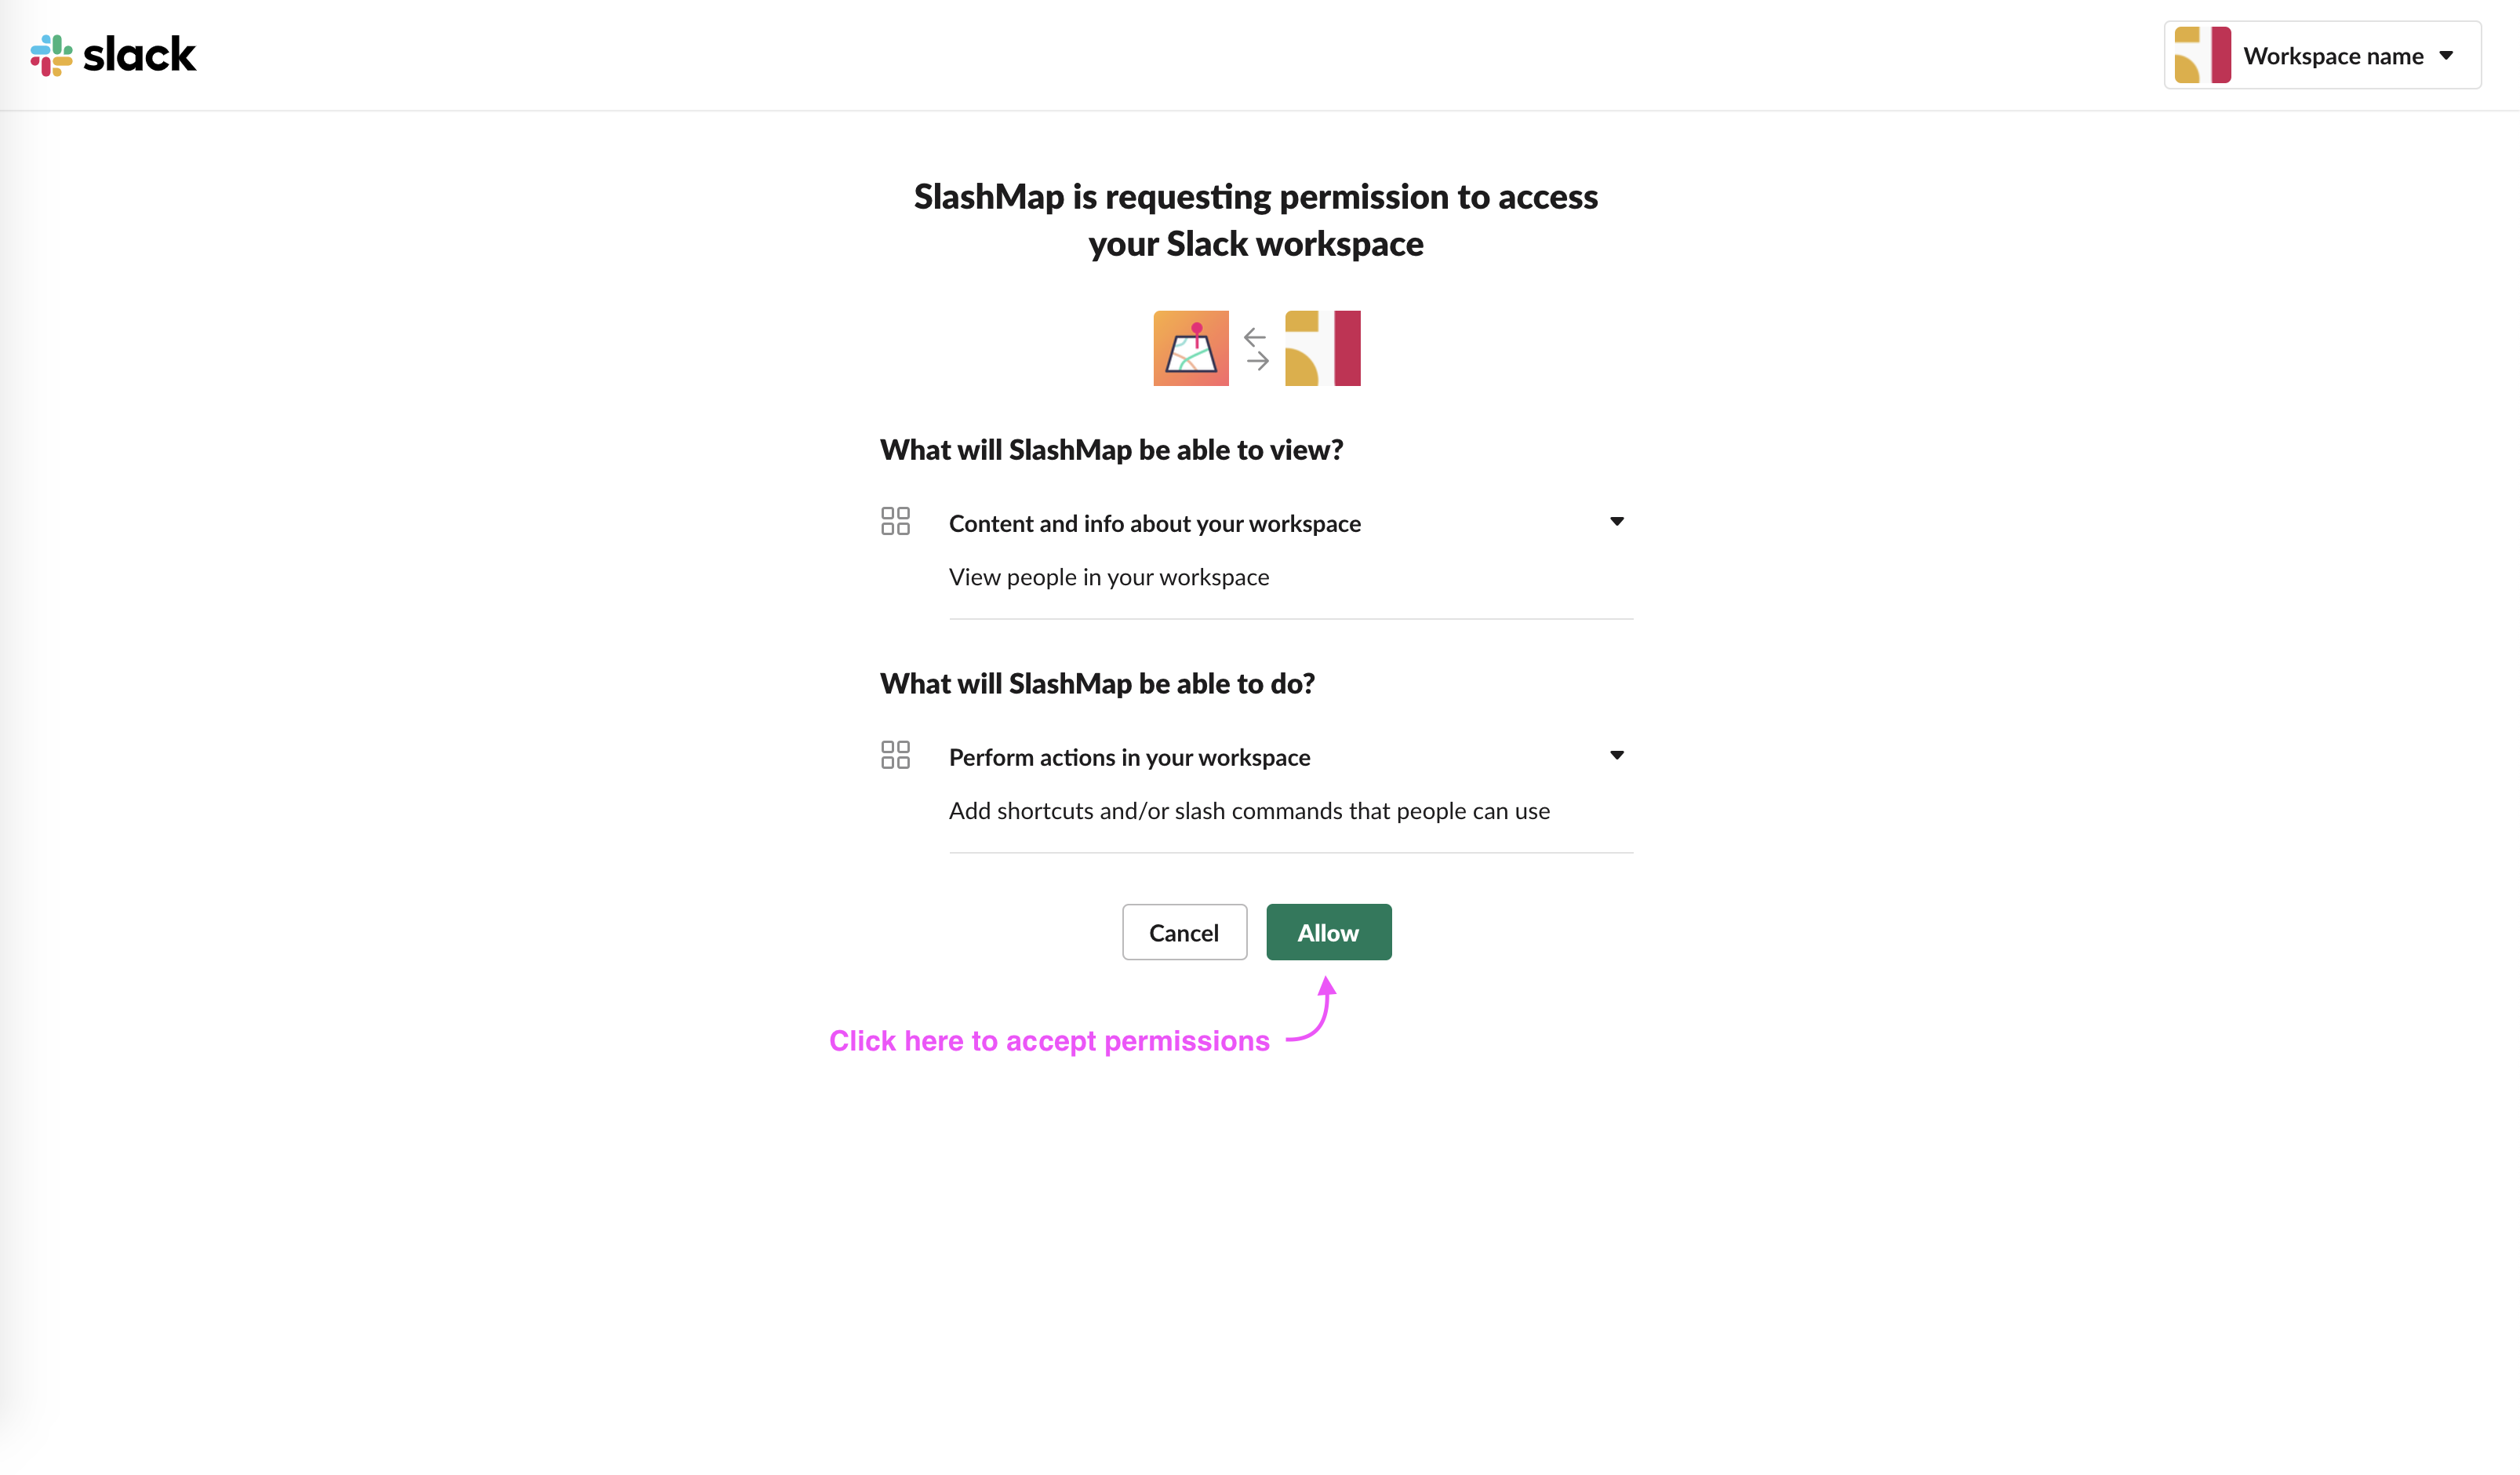
Now you need to accept permissions granted to SlashMap. This is the smallest possible set of permisions required by the plugin to work. We ask only for two essential permissions: to get a list of people in your workspace and to add a slash command.
Hooray! At this point, the setup is done!
Now everyone in your
Slack workspace can simply type
/map
to get a map with a marked pin, right in Slack.
To try it out, go to Slack and type
/map LOCATION NAME
in any conversation.
Remember to replace the
LOCATION NAME
placeholder with the exact
value that you used when adding location in
step 2.6.
IMPORTANT NOTE:
Keep in mind that the value displayed in
the SlashMap must equal the value that you enter in Slack.
For instance
ExampleLocation,
@ExampleLocation
and
@Example Location
are considered different keywords.
